How Wide Should You Space The Wings On Your Butterfly Options Trade?
If you’ve been trading butterflies for any period of time, you’ve probably wondered if you set up your butterfly trade correctly. Did you make the wings wide enough, too wide, and, of course, how wide “should” your butterfly trade wings be spaced?
Understanding the problem:
The challenge with wing width on butterfly trades is that using a fixed number doesn’t necessarily create the same trade characteristics on a month to month basis. The reason for the difference relates to the variables that impact the characteristics of a butterfly. Additionally, since an options butterfly trade is a spread, choosing wing width is effectively a choice about the relationship of those variables. Conceptually it’s a little confusing, but a few examples will help.
Let’s suppose we’re thinking about a balanced Butterfly in $RUT with 50 point wings. We know that a 50 point wide $RUT fly trades differently than a 50 point wide $SPX fly and both are very different than a 50 point wide $IWM fly (essentially a strangle). Wing width is one part of what makes the butterflies different, but in reality the factors that impact the price and trading characteristics of a butterfly options trade include . . .
Factors Impacting Butterfly Pricing & Trading Characteristics:
- Price of the underlying
- Implied Volatility
- Strike Width
- Days to Expiration
- Moneyness (At The Money vs. Out Of The Money)
- Skew
Comparing Butterflies:
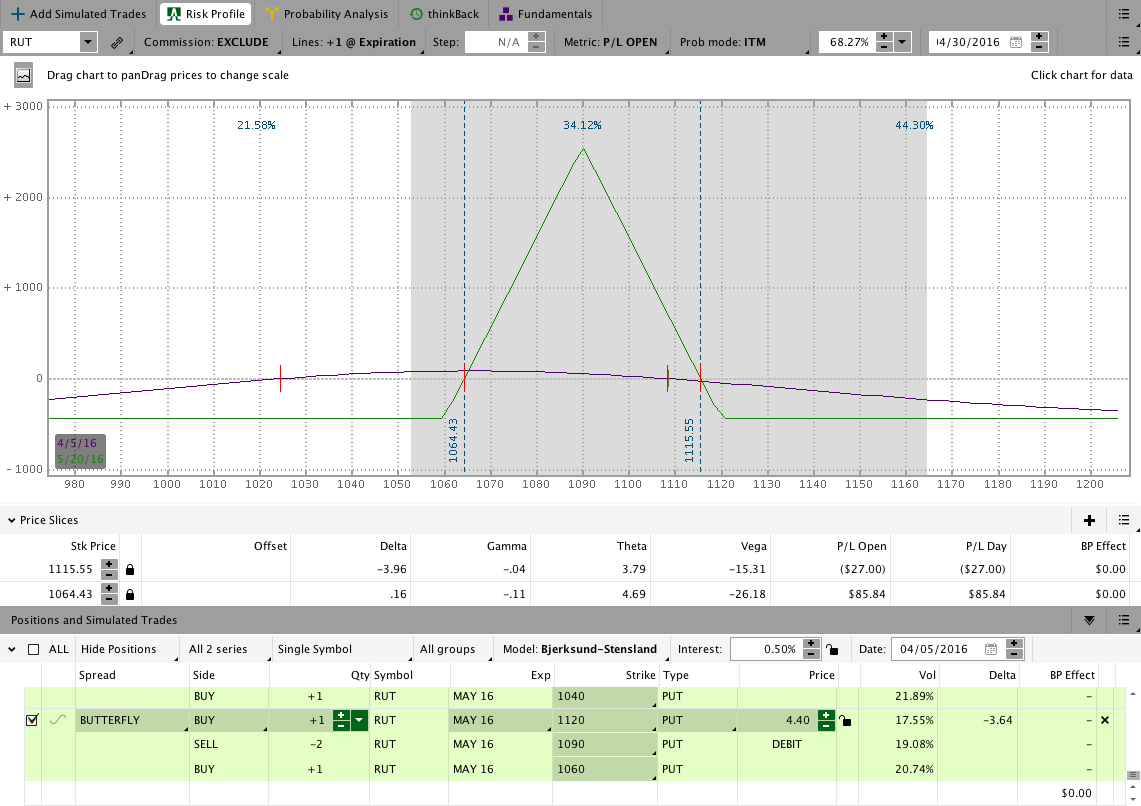
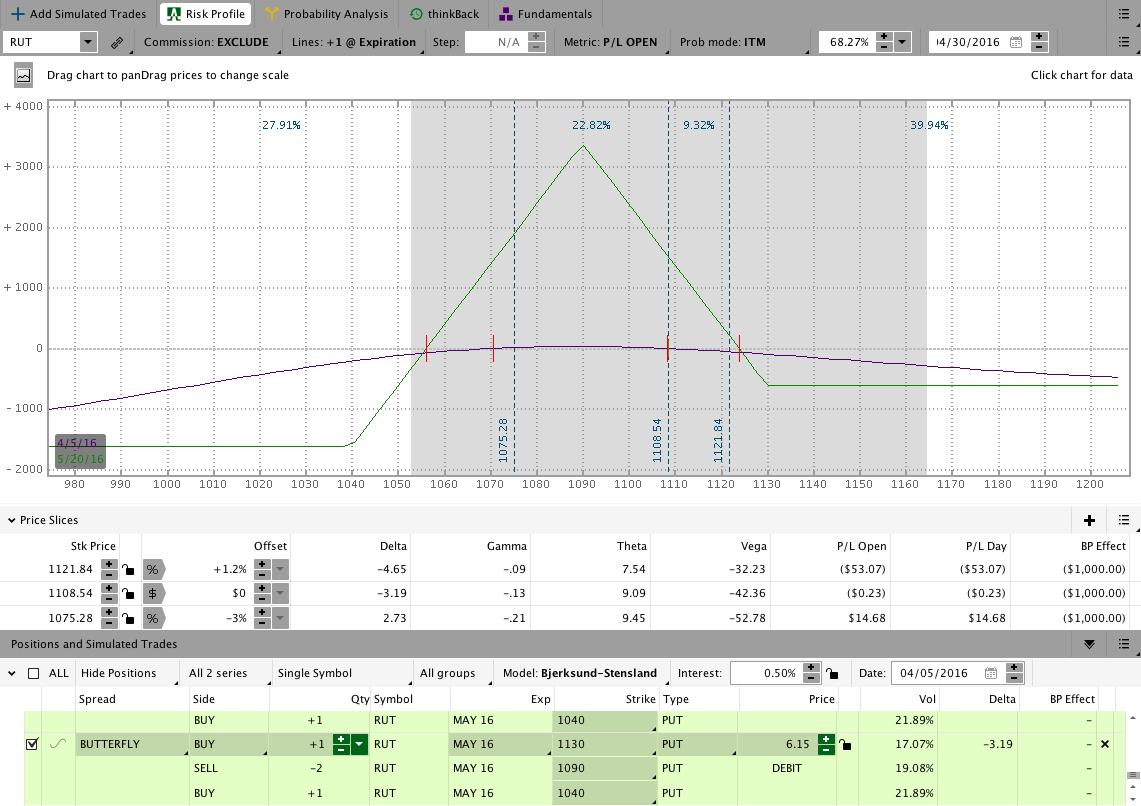
In order to simplify the discussion, we’ll hold the variables above constant and just focus on how changing wing width impacts a butterfly. The images below compare a few slightly bearishly positioned RUT Butterfly trades to illustrate how different wing widths create very different positions. The images below make use of options with 44 days to expiration and the short strikes are centered at 1090 with RUT trading around 1108 and RVX at 19.08.
30 Point Wings RUT Options Butterfly:
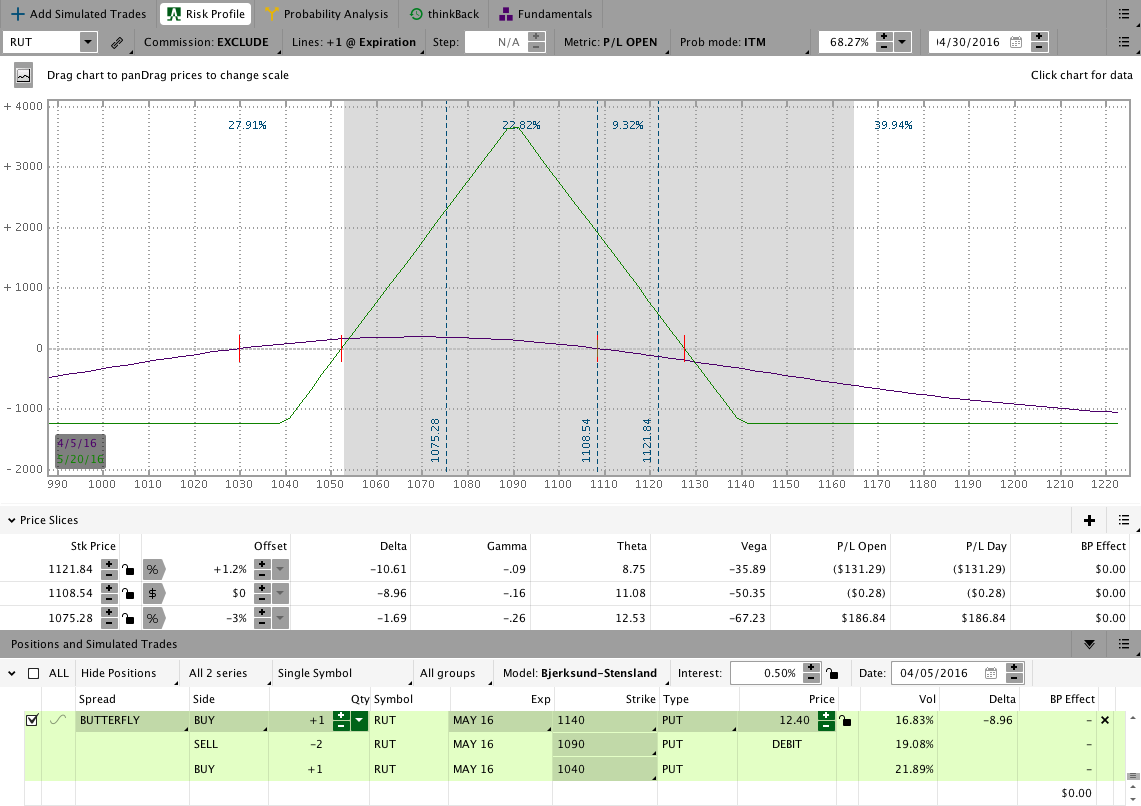
50 Point Wings RUT Options Butterfly:
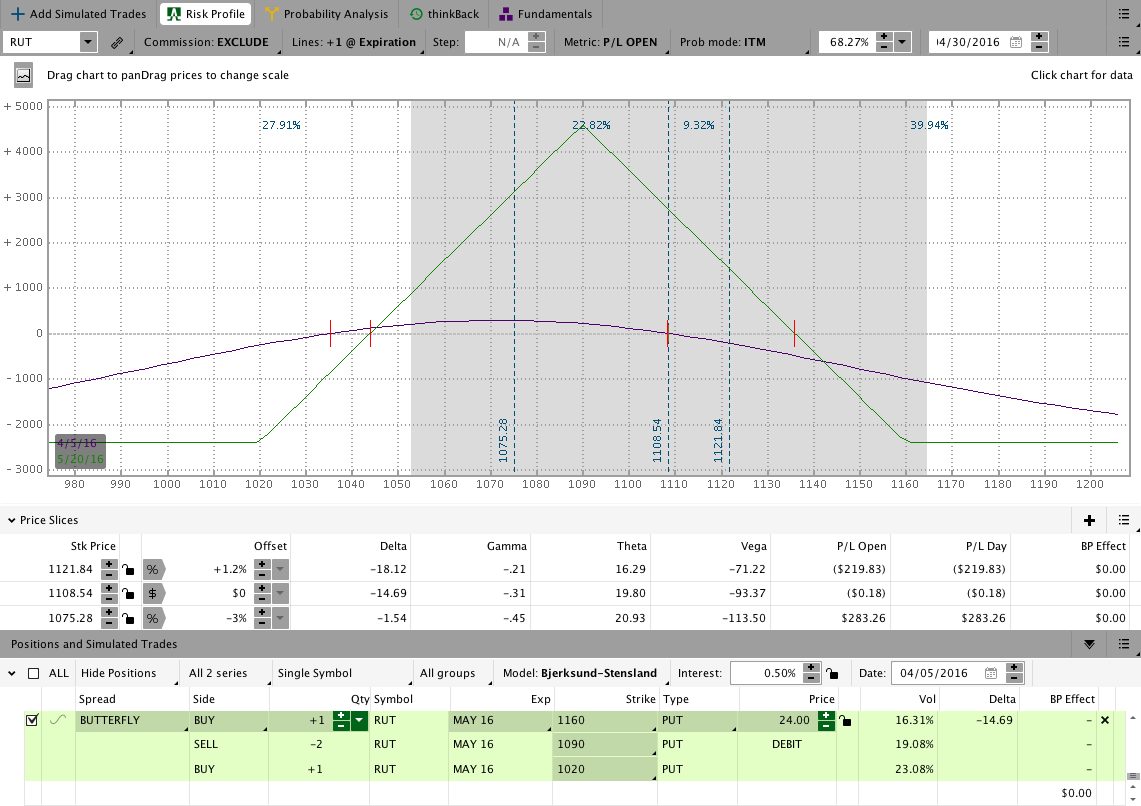
70 Point Wings RUT Option Butterfly:
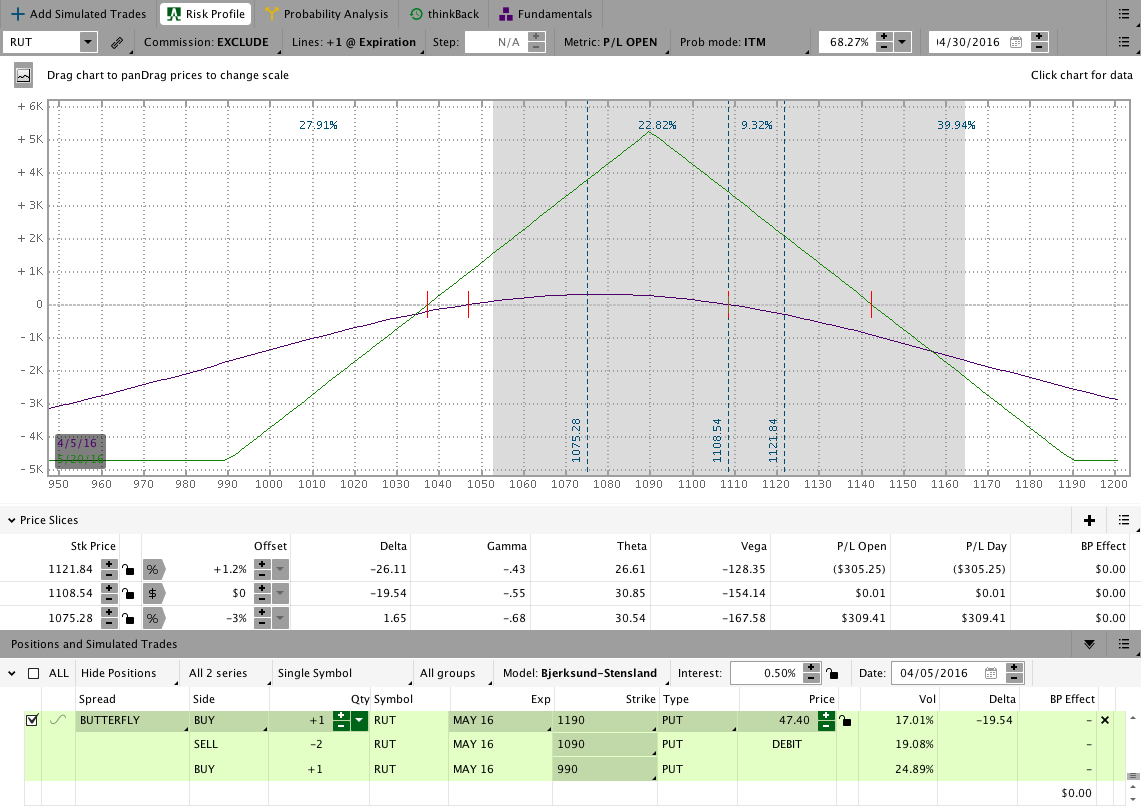
100 Point Wings RUT Options Butterfly:
A 50×40 RUT Broken Wing Butterfly (for a little variation):
Numerical Comparison:
When we look at the images of the butterfly trades above, it’s pretty obvious that wider butterflies tend to have steeper T+Zero lines and wider expiration break even points. The table below quantifies some of the numbers from the images above.

In the risk/reward column above it’s important to recognize that narrower butterflies generally have a more favorable risk/reward. In other words, every dollar of risk has more dollars of potential reward and a wider butterfly has a lower risk/reward. The tradeoff for more favorable risk/reward is a narrower expiration profit range.
The column that is the furthest to the right in the image above looks at the range/risk. In that column we’re dividing the profit range by the dollars at risk. We’re evaluating how much risk we’re taking for the corresponding profit range. Narrower butterflies win again, but that comes with a narrower profit range in general.
Intuitively, the numbers above make sense. When we take risk with options, there’s a tradeoff between probability of success and potential return. Narrower butterflies have a higher potential return on risk, but there is a lower probability of achieving that return. Wider butterflies have a lower potential return on risk with a higher probability of achieving the return.
So how wide should you space your butterfly trade wings?
Back to the original question. The answer is that it depends . . . surely you weren’t expecting an exact number.
When you’re trading any options strategy (or trading at all), you should have a plan prior to entering the trade. If you don’t have a plan before getting into a trade, there are more pressing issues than wing width. Assuming you have a plan for the trade, you should already roughly know what you want. What I mean is that the strategy you’re trading is likely built around some expectation of the T+Zero line and the T+Zero line of your position is influenced by the factors above.
When we compare the butterflies in the table above, there are some big differences between a 30 point wide fly and a 100 point wide fly. The differences between a 50 and 70 point fly are less noticeable, but there are slight tradeoffs.
My personal preference for the CIB is to begin by looking at butterflies with a desired risk:reward (25-35% at 45-60 DTE) and then attempt to achieve the position Greeks I want. Obviously risk:reward isn’t perfect, but it does give us a way to roughly describe the characteristics of the butterfly and T+Zero line we want. In using a rough risk:reward to choose the butterfly we effectively include many of the pricing factors listed at the top of the post.
In making a choice about butterfly wing spacing we’re really just making a decision about the position we want. There are no right or wrong wing widths, but as wings get wider you begin to take on an increasing amount of risk relative to the additional range you receive.
Want to receive an alert when new content is posted?
Sign up for my email list and stay up to date with the latest information on options trading.
Click here to sign up for the list, get a copy of the Theta Trend Options Trading System, the Trade Tacker I use, and information about new systems.
Even better . . . it’s all totally free.